Ulogd and JSON output
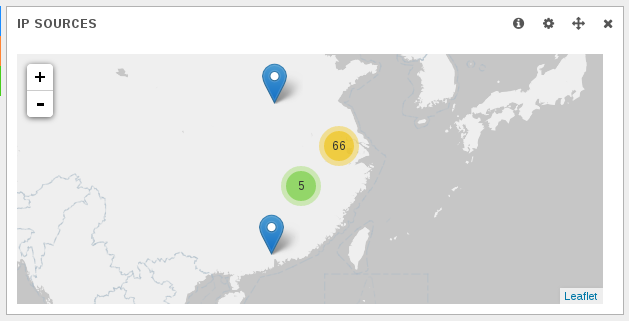
In February 2014, I’ve commited a new output plugin to ulogd, the userspace logging daemon for Netfilter. This is a JSON output plugin which output logs into a file in JSON format. The interest of the JSON format is that it is easily parsed by software just as logstash. And once data are understood by logstash, you can get some nice and useful dashboard in Kibana:

This post explains how to configure ulogd and iptables to do packet logging and differentiate accepted and blocked packets. If you want to see how cool is the result, just check my post: Investigation on an attack tool used in China.
Installation
At the time of this writing, the JSON output plugin for ulogd is only available in the git tree. Ulogd 2.0.4 will contain the feature.
If you need to get the source, you can do:
git clone git://git.netfilter.org/ulogd2
Then the build is standard:
./autogen.sh
./configure
make
sudo make install
Please note that at the end of the configure, you must see:
Ulogd configuration:
  Input plugins:
    NFLOG plugin:			yes
...
    NFACCT plugin:			yes
  Output plugins:
    PCAP plugin:			yes
...
    JSON plugin:			yes
If the JSON plugin is not build, you need to install libjansson devel files on your system and rerun configure.
Configuration
Ulogd configuration
All the edits are made in the ulogd.conf file. With default configure option the file is in /usr/local/etc/.
First, you need to activate the JSON plugin:
plugin="/home/eric/builds/ulogd/lib/ulogd/ulogd_output_JSON.so"
Then we define two stacks for logging. It will be used to differentiate accepted packets from dropped packets:
stack=log2:NFLOG,base1:BASE,ifi1:IFINDEX,ip2str1:IP2STR,mac2str1:HWHDR,json1:JSON
stack=log3:NFLOG,base1:BASE,ifi1:IFINDEX,ip2str1:IP2STR,mac2str1:HWHDR,json1:JSON
The first stack will be used to log accepted packet, so we the numeric_label to 1 in set in [log2].
In [log3], we use a numeric_label of 0.
[log2]
group=1 # Group has to be different from the one use in log1
numeric_label=1

[log3]
group=2 # Group has to be different from the one use in log1/log2
numeric_label=0 # you can label the log info based on the packet verdict
The last thing to edit is the configuration of the JSON instance:
[json1]
sync=1
device="My awesome FW"
boolean_label=1
Here we say we want log and write on disk configuration (via sync) and we named our device My awesome FW.
Last value boolean_label is the most tricky. It this configuration variable is set to 1, the numeric_label will
be used to decide if a packet has been accepted or blocked. It this variable is set non null, then the packet is seen as allowed.
If not, then it is seen as blocked.
Sample Iptables rules
In this example, packets to port 22 are logged and accepted and thus are logged in nflog-group 1. Packet in the default drop rule are sent to group 2 because they are dropped.
iptables -A INPUT -m state --state RELATED,ESTABLISHED -j ACCEPT
iptables -A INPUT ! -i lo -p tcp -m tcp --dport 22 --tcp-flags FIN,SYN,RST,ACK SYN -m state --state NEW -j NFLOG --nflog-prefix  "SSH Attempt" --nflog-group 1
iptables -A INPUT -i lo -j ACCEPT
iptables -A INPUT -p tcp -m tcp --dport 22 -m state --state NEW -j ACCEPT
iptables -A INPUT -j NFLOG --nflog-prefix  "Input IPv4 Default DROP" --nflog-group 2
There is no difference in IPv6, we just use nflog-group 1 and 2 with the same purpose:
ip6tables -A INPUT -m state --state RELATED,ESTABLISHED -j ACCEPT
ip6tables -A INPUT ! -i lo -p tcp -m tcp --dport 22 --tcp-flags FIN,SYN,RST,ACK SYN -m state --state NEW -j NFLOG --nflog-prefix  "SSH Attempt" --nflog-group 1
ip6tables -A INPUT ! -i lo -p ipv6-icmp -m icmp6 --icmpv6-type 128 -m state --state NEW -j NFLOG --nflog-prefix  "Input ICMPv6" --nflog-group 1
ip6tables -A INPUT -p ipv6-icmp -j ACCEPT
ip6tables -A INPUT -p tcp -m tcp --dport 22 -m state --state NEW -j ACCEPT
ip6tables -A INPUT -i lo -j ACCEPT
ip6tables -A INPUT -j NFLOG --nflog-prefix  "Input IPv6 Default DROP" --nflog-group 2
Logstash configuration
Logstash configuration is simple. You must simply declare the ulogd.json file as input and optionaly you can activate geoip on the src_ip key:
input {
   file {
      path => [ "/var/log/ulogd.json"]
      codec =>   json
   }
}

filter {
  if [src_ip]  {
    geoip {
      source => "src_ip"
      target => "geoip"
      add_field => [ "[geoip][coordinates]", "%{[geoip][longitude]}" ]
      add_field => [ "[geoip][coordinates]", "%{[geoip][latitude]}"  ]
    }
    mutate {
      convert => [ "[geoip][coordinates]", "float" ]
    }
  }
}

output {
  stdout { codec => rubydebug }
  elasticsearch { embedded => true }
}
Usage
To start ulogd in daemon mode, simply run:
ulogd -d
You can download logstash from their website and start it with the following command line:
java -jar logstash-1.3.3-flatjar.jar agent -f etc/logstash.conf --log log/logstash-indexer.out -- web
Once done, just point your browser to localhost:9292 and enjoy nice and interesting graphs.